
Deployment management and release control should be part of your RPA automation orchestration, especially considering good development practices. In this article, we will understand how to deliver the bot to the BotCity Orchestrator platform for execution and how to control the versions and evolution of your project.
How to run your automation
Once you’ve finished developing your automation, you can run it locally on your computer. But this won’t help you manage and govern your bots, errors, logs, schedules, and other essential features. You can learn more about running your automation by a guide on how to manage the execution of your automation.. Além disso, fazer esse gerenciamento permite um apoio no versionamento do seu projeto, prática de engenharia de software extremamente importante no cotidiano. Então vamos entender primeiro como fazer o deploy de uma automação e como fazer o controle de versionamento para quando for necessário aplicar alterações no código.
How to deploy a new automation
You should already have your bot developed and built at this stage, with the zipped folder containing the essential files for executing the project. To do this, follow the instructions in the tutorial on how to orchestrate your automation. You can create your free account
to access the BotCity Orchestrator. Log in and click “Orchestrator” in the menu on the left side of the screen.

Then click “Easy Deploy” in the menu on the left side of the screen.
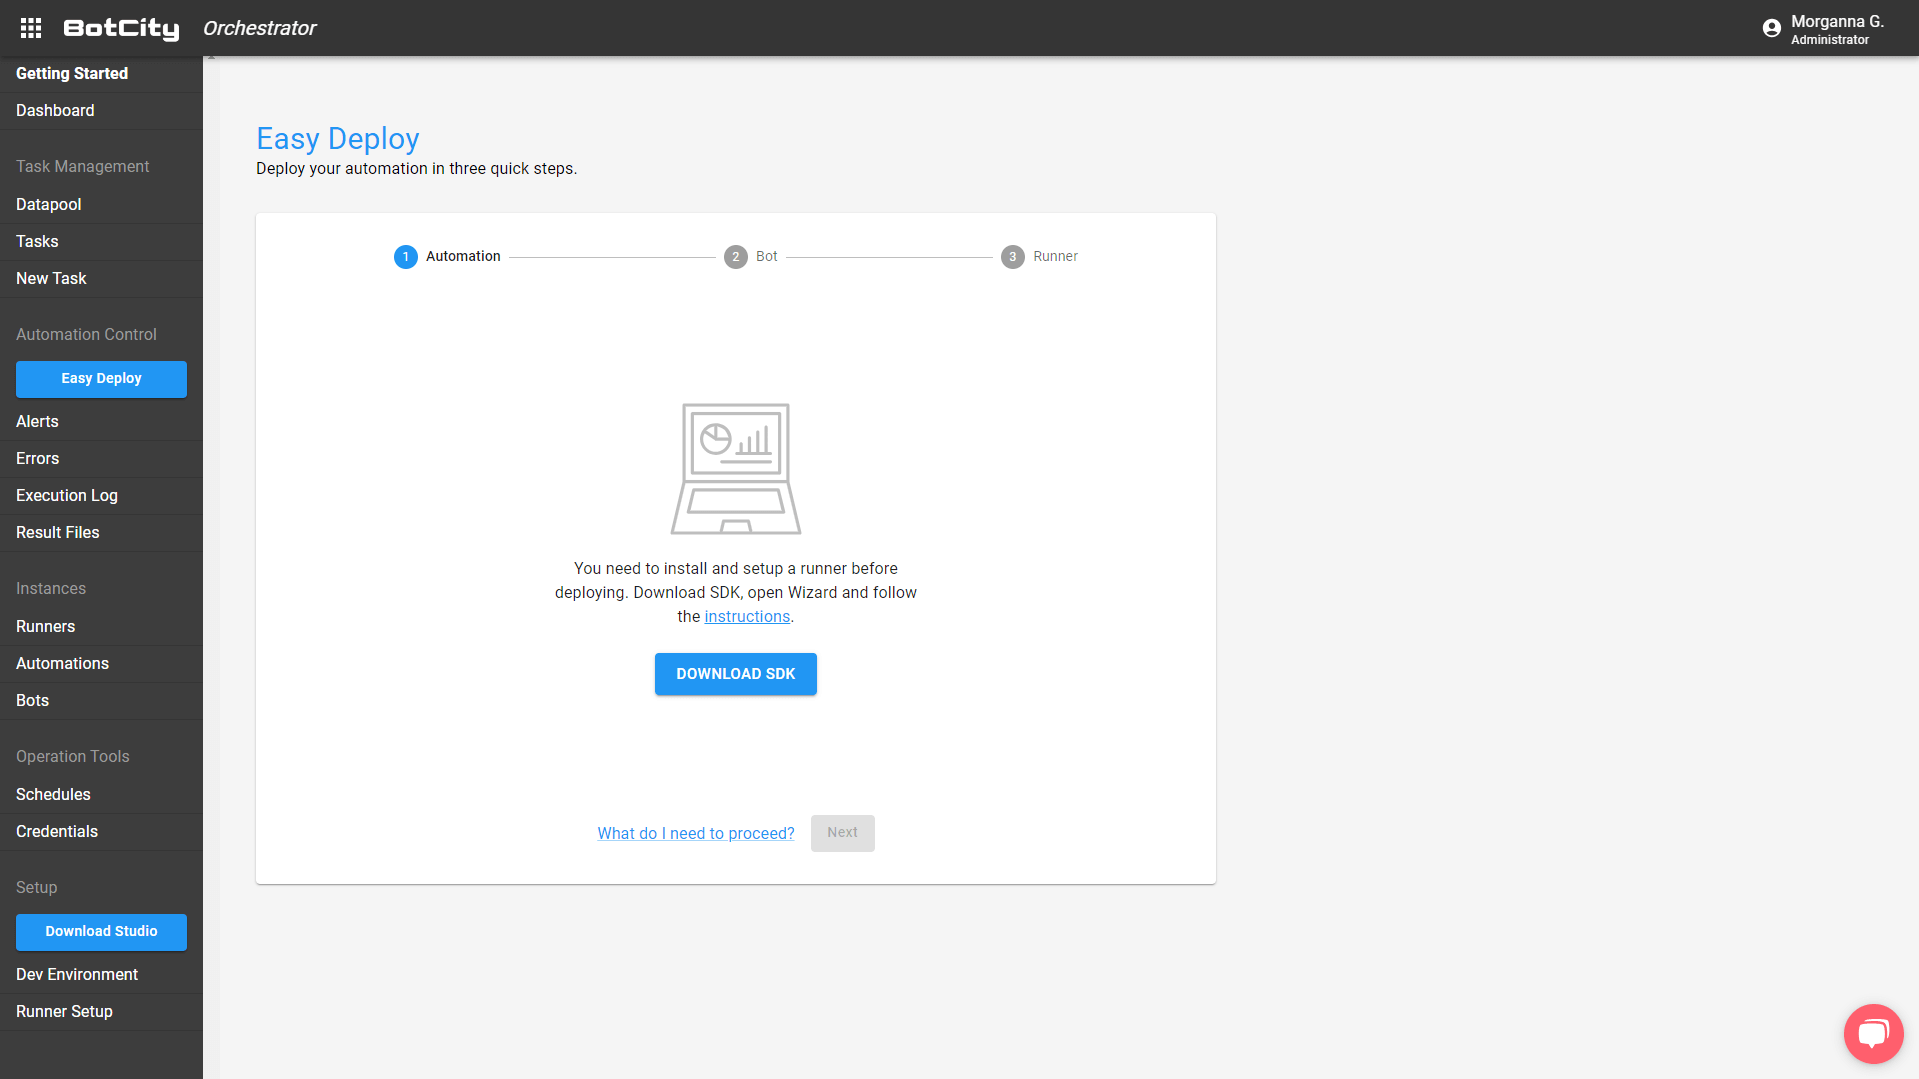
If this is your first deployment, BotCity Orchestrator will guide you through downloading the SDK and creating a Runner before proceeding. Follow the steps on the screen to have your BotCity Runner ready to run your automation.
After installing and creating the Runner, refresh the page, and you will have the Deploy options.
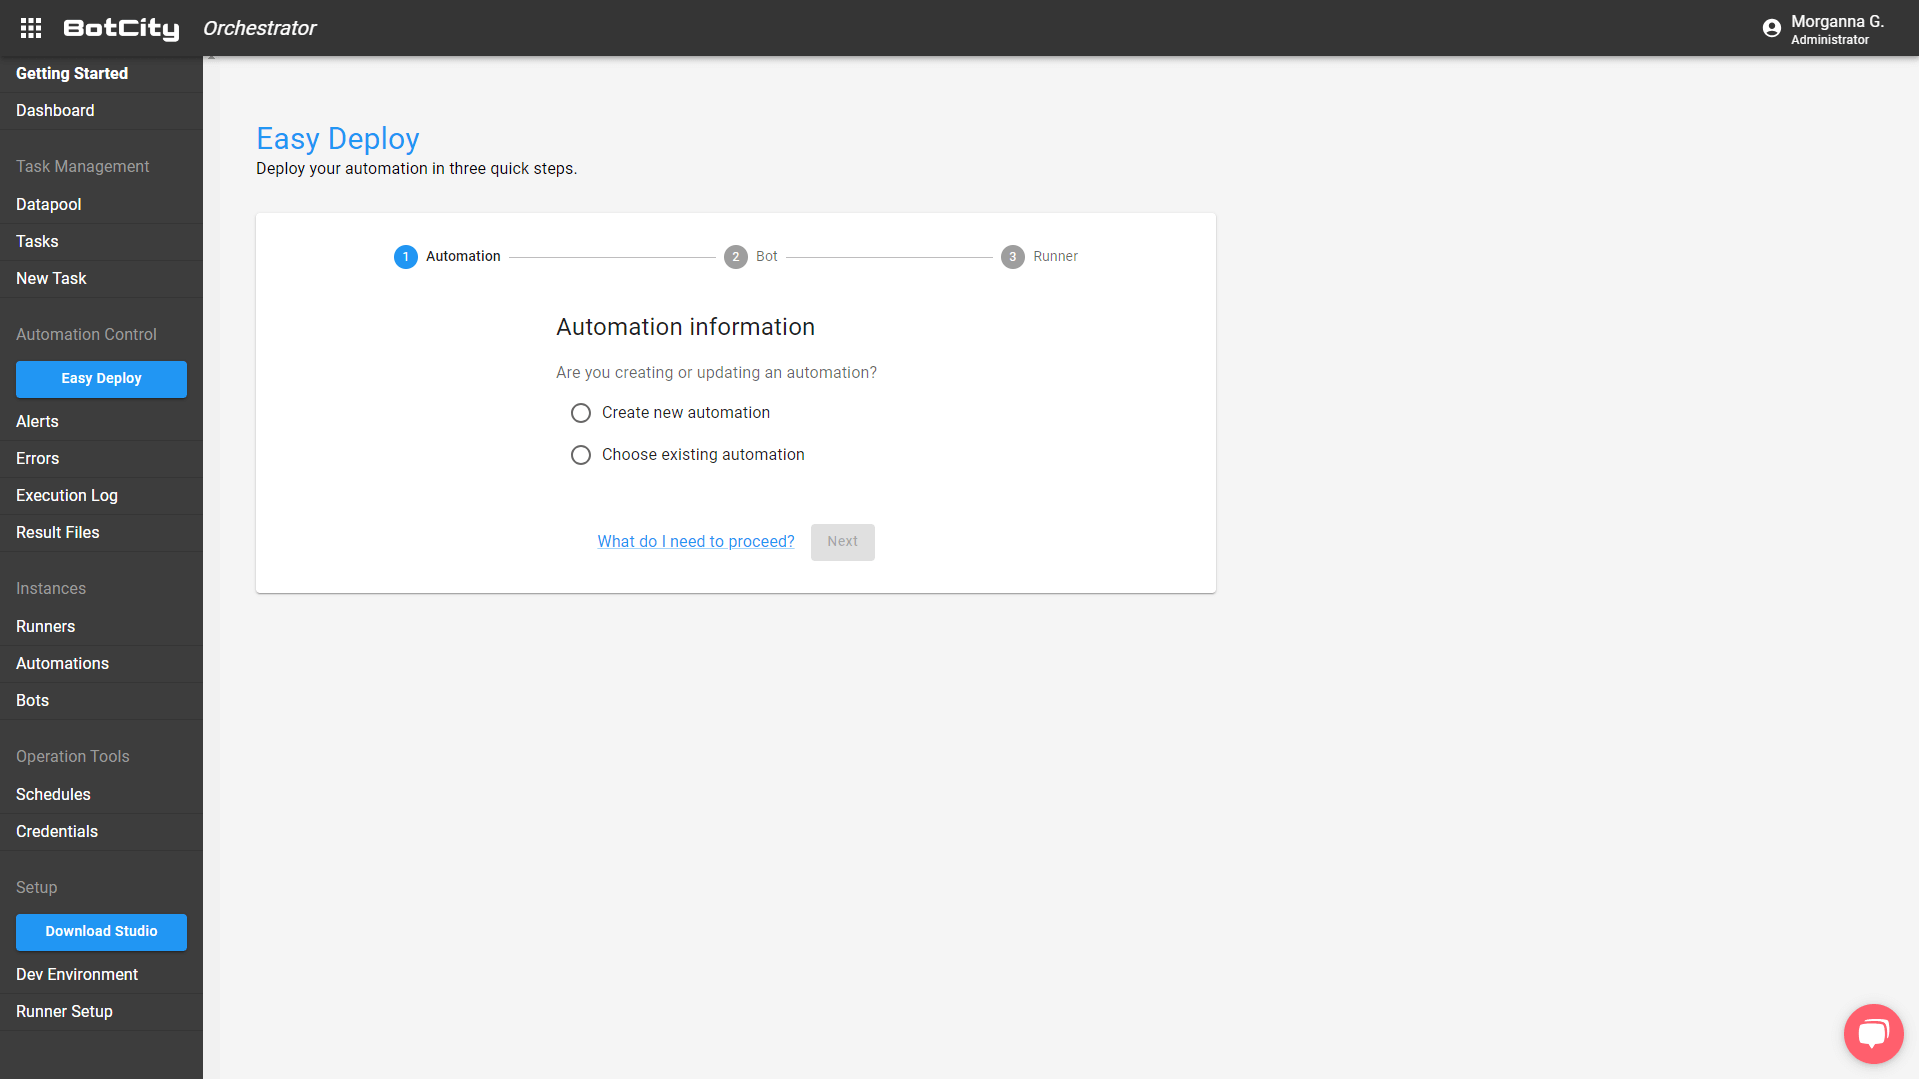
Since we are creating the first automation, we will choose “Create new automation.”

When clicking on the right option, new fields will appear for us to input automation information, such as:
- Automation name: where you have to input the name of the automation;
- Repository: where you must inform which repository the automation will be linked to;
- Automation description: where you have to input a description of what the automation does.
⚠️ Learn more at repository documentation.
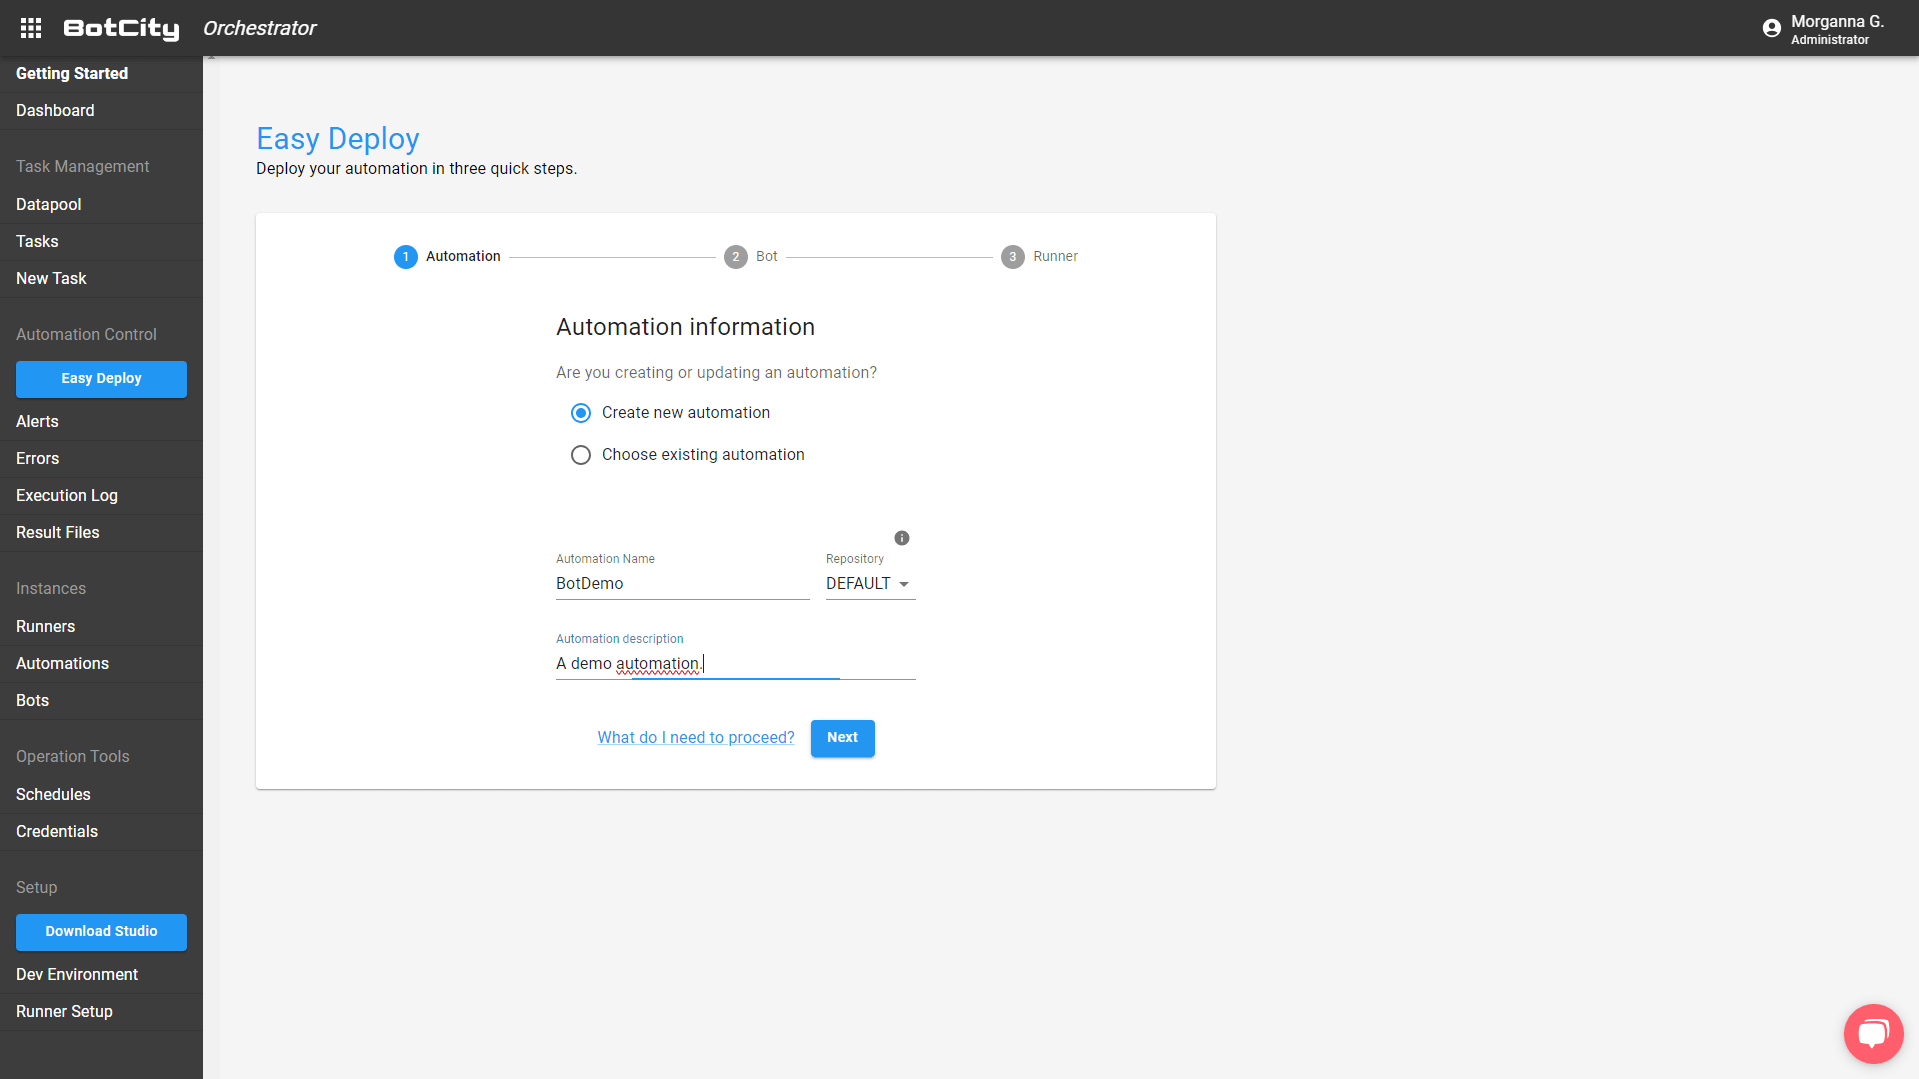
After you fill in all the information, the “next” button will be activated. Click on it to proceed to the second step.
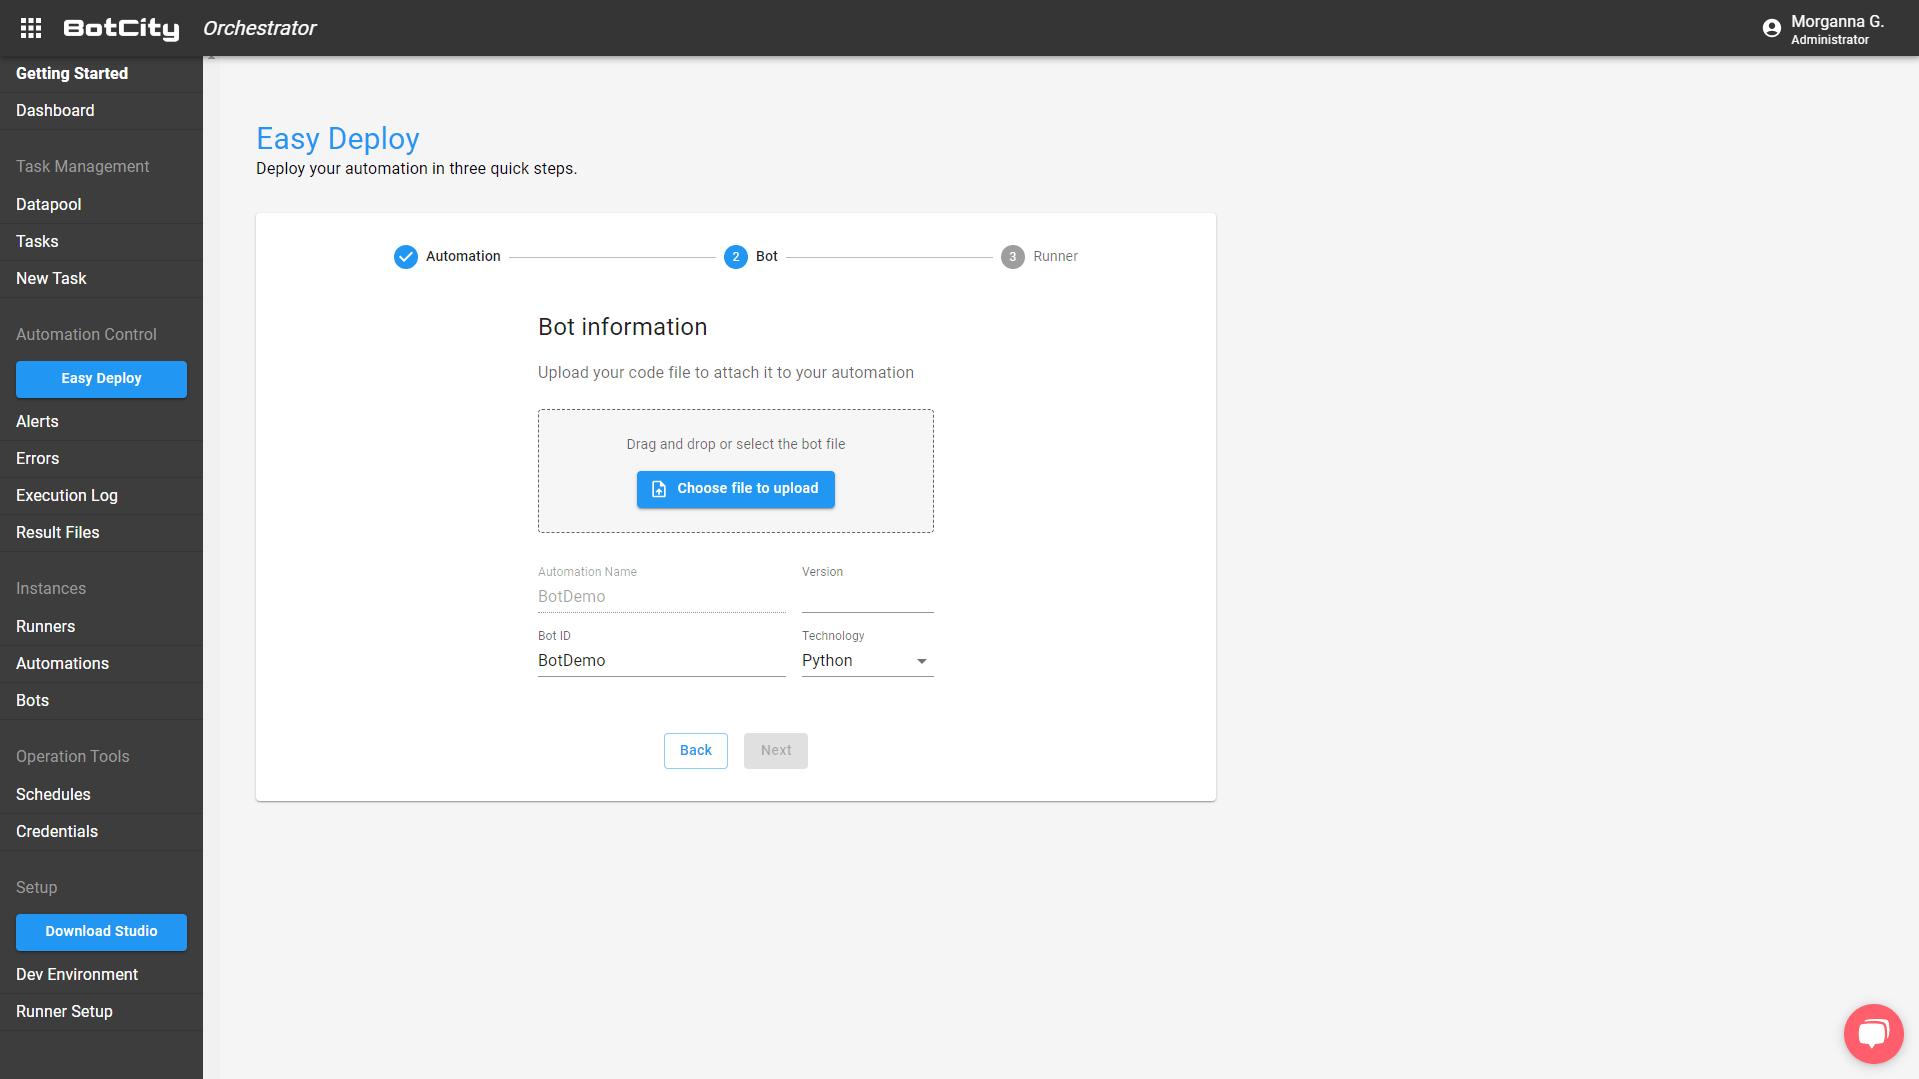
In this new screen, we need to fill in the following requested information:
- Version: where we will put the version of the robot to be made available for execution in production;
- Technology: you must configure which programming language you use in your code. The robot in the example was developed in Python.
Besides, there is a highlighted button called “Choose file to upload.” We must then place the compressed folder generated by the application build.

Then, we must click “Next” and configure the BotCity Runner created to execute the automation.
After that, by clicking “Next,” we finish deploying the automation. Very simple!

To execute your new automation task, click “New Task.” To schedule it, click on “New Schedule”. In addition, you can also follow the guidelines described in documentation about new tasks.
How to version your project
To do this, you can use some very important tools created for this purpose. For example, to control versions, use Git. E para gerenciar os repositórios dos seus projetos e automações, você pode utilizar o GitHub, GitLab, Bitbucket, among others. Explore the possibilities and use the one that makes the most sense in your context.
What is semantic versioning
There is a standard created for the development community to use versioning, which we call semantic versioning. This means that we have a recommended way to version releases of our projects.
We usually use three values for our version. For example: 1.0.0, 1.2.1, 2.10.154, among others. What does each of these values mean:
- The first value is called “major.” We change this value to the new version when we make changes to the code that is incompatible with the previous version. For example, if the current version is 1.0.0 and the new one is 2.0.0, significant changes have been made to the point that they are no longer compatible and may require some adaptations to use the latest version.
- The second value, located in the middle, is called “minor.” This value is changed when we add new features to the code without interfering with the compatibility. For example, if the current version is 1.2.0 and the latest version is 1.3.0, new features are available in that code.
- The third and final value is called “patch.” When it is changed, it means that we are fixing bugs and maintaining project compatibility. In other words, if the current version is 1.0.2 and the new version is 1.0.3, it means that the latest version is providing fixes for previous problems.
Following this standard makes understanding automation project versions easier and more semantic. Learn more at semantic versioning.
How to control the release of your automation
In the BotCity Orchestrator platform, you can manage which version of your project will be released and will run in the production environment. Let’s understand the step-by-step process of how to do this.
The path for deploying is the same. But instead of choosing the option to create a new automation, we will choose the item “Choose existing automation.”

In addition, we will fill in the “Repository” field with the repository where we previously placed the bot and then enter the name of the automation whose version we will update.
In the next step, we will upload the new zipped file with the project build and the updated code and say which version we are making available. In the example, we use semantic versioning and put 1.0.1 to fix a bug.

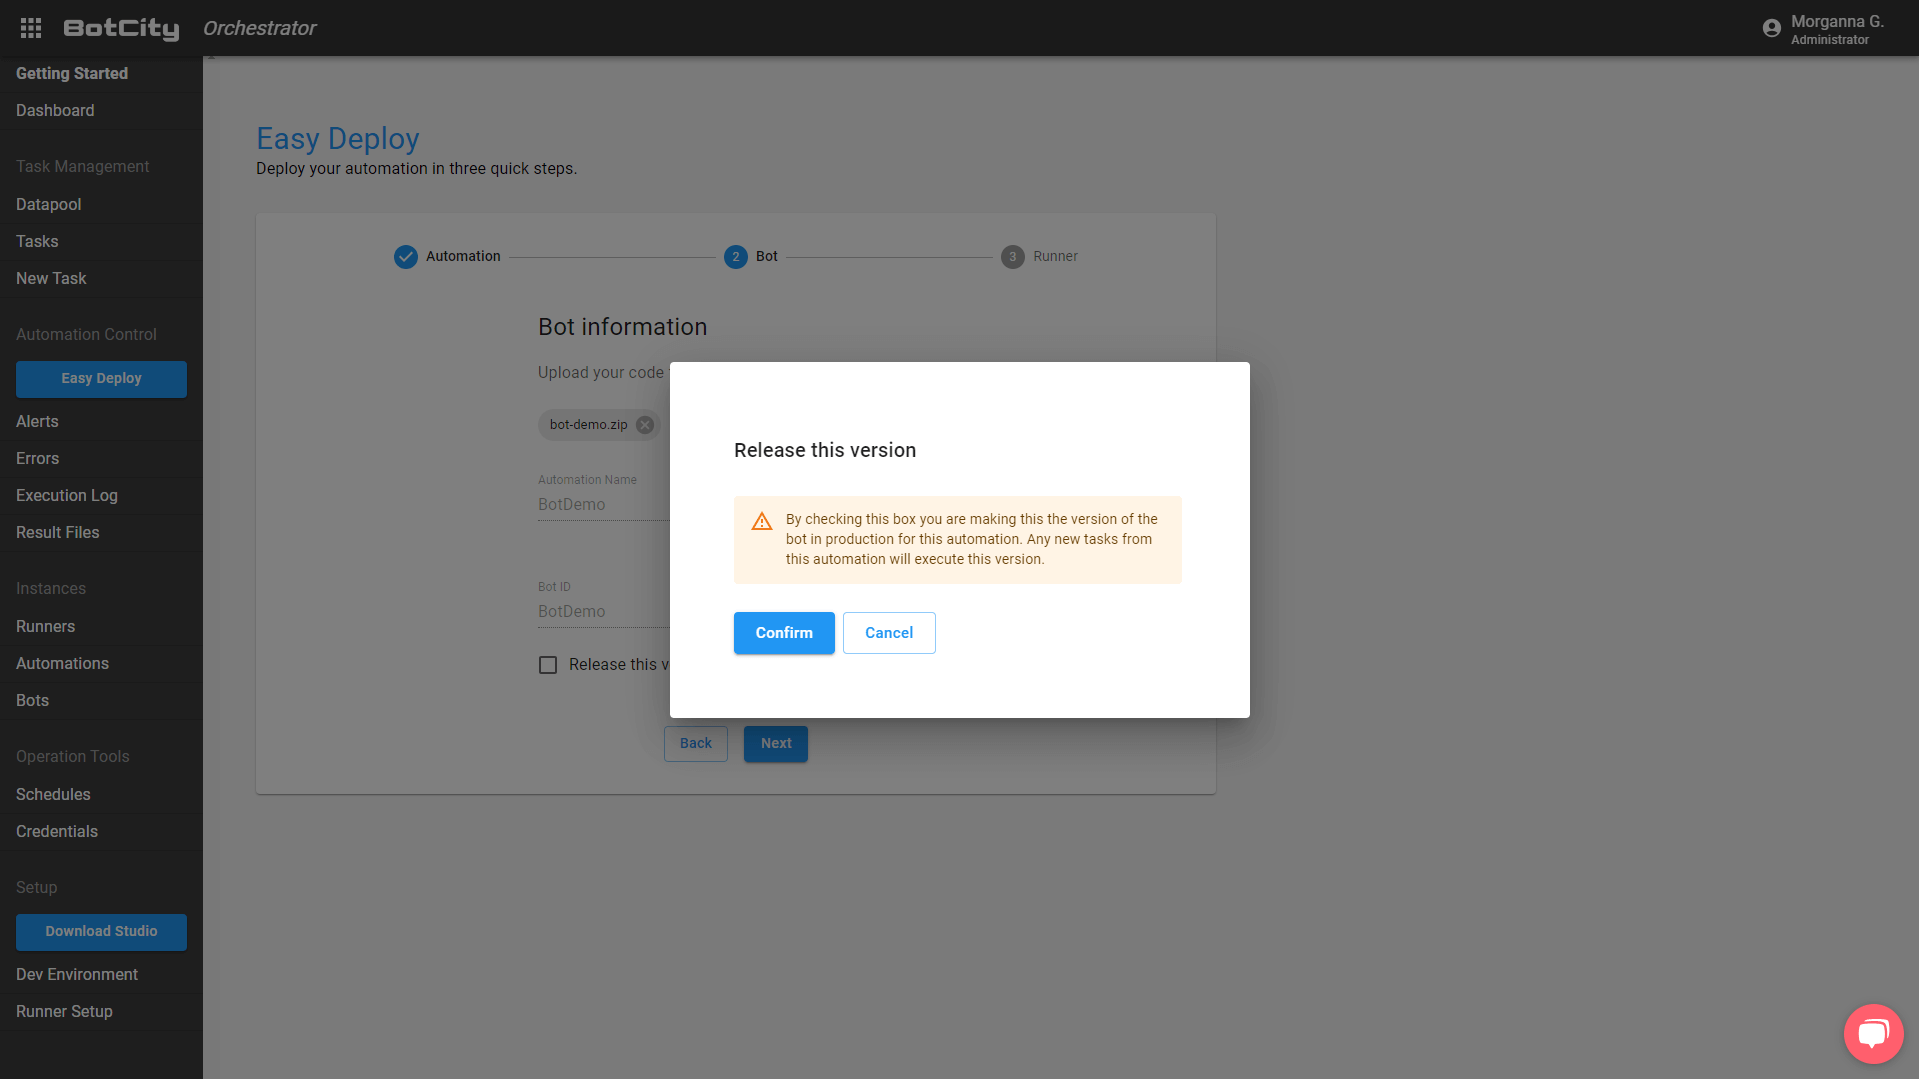
At this point, you can also set up the new version to be the release version, the version that will run when we create new tasks right after this new deployment.
When you click “Release this version,” you will receive a new window for confirmation. Just click on “Confirm”.
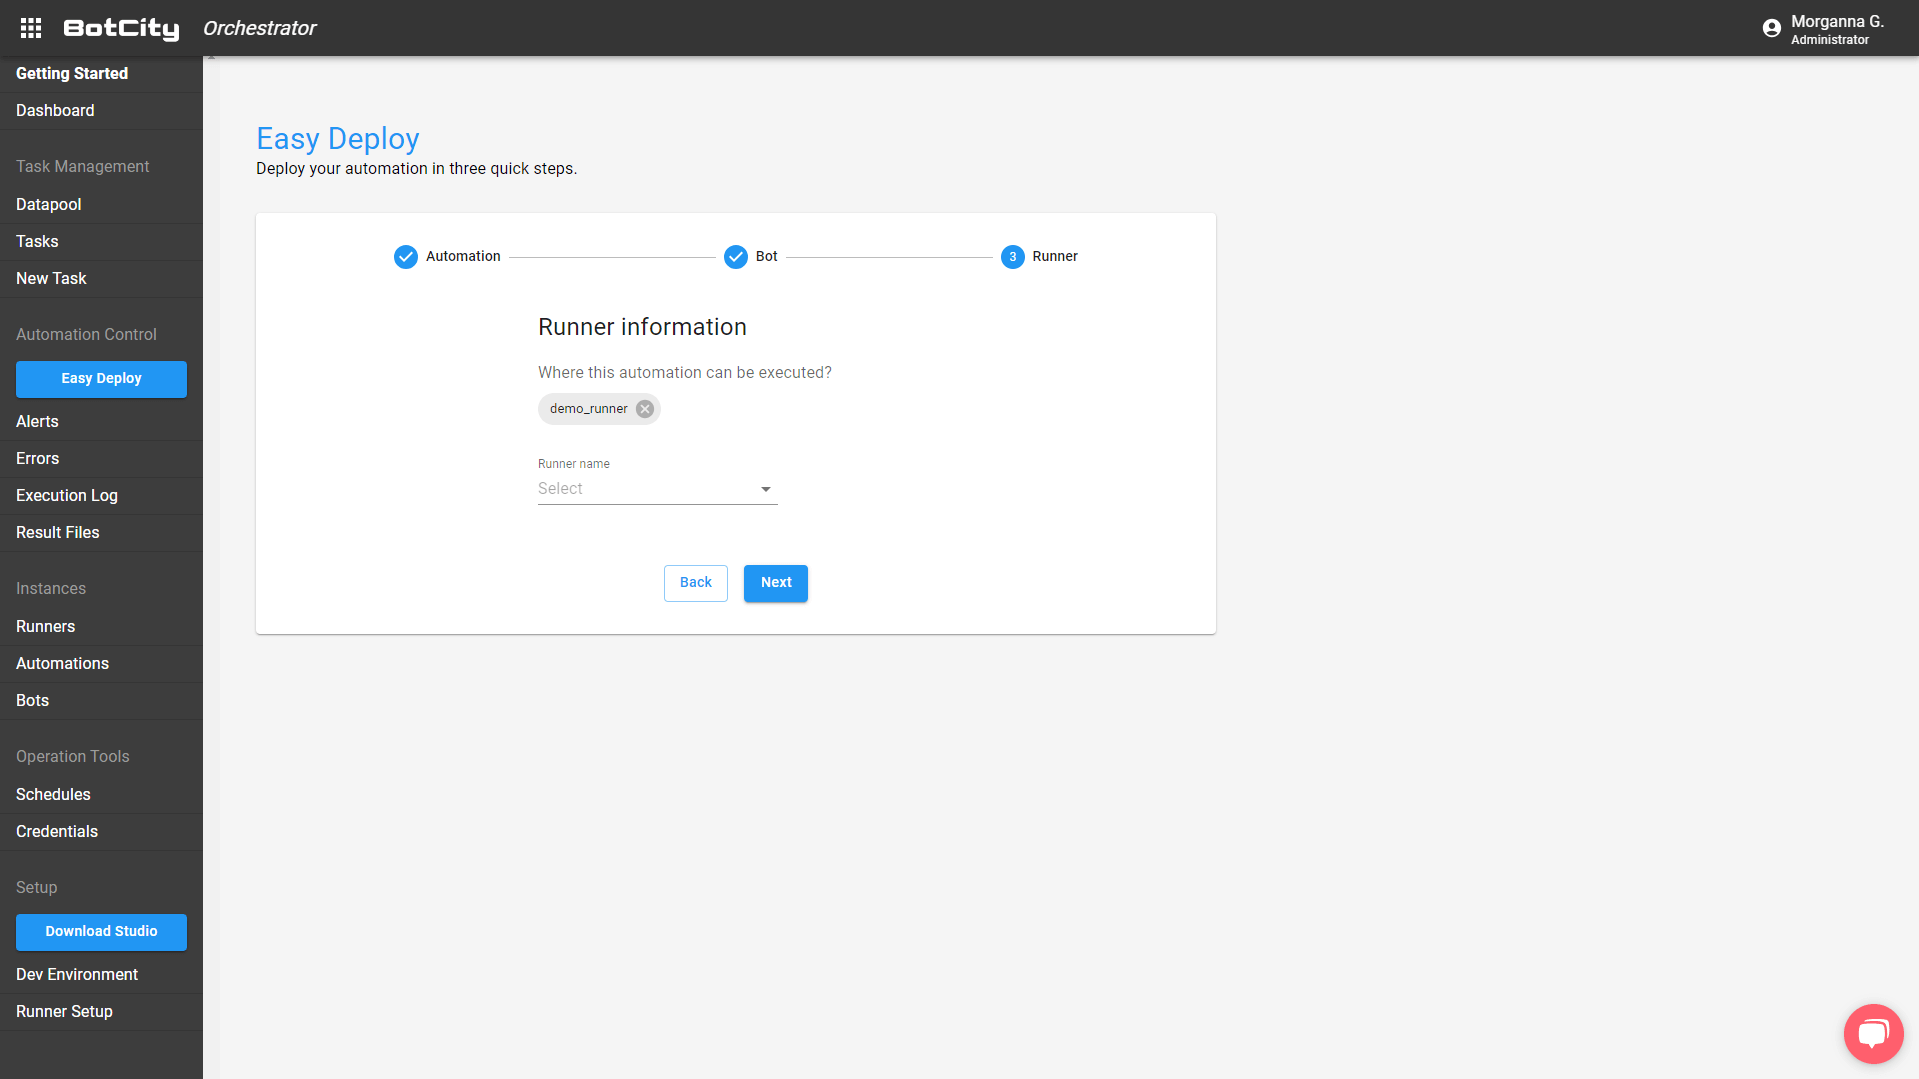
In the last step, we need to select the BotCity Runner, which will execute the automation. It can be kept the same, or it can be changed, or even add some more Runners available for you to have parallelism in your automation. Após isso, clique em “Next” para finalizar.

Once the three steps are completed, you can create new tasks or schedules. However, if you want to change which of the available versions will be the release version, click “Bots,” located in the menu on the left side of the screen. If necessary, you can use the filters to find your bot.
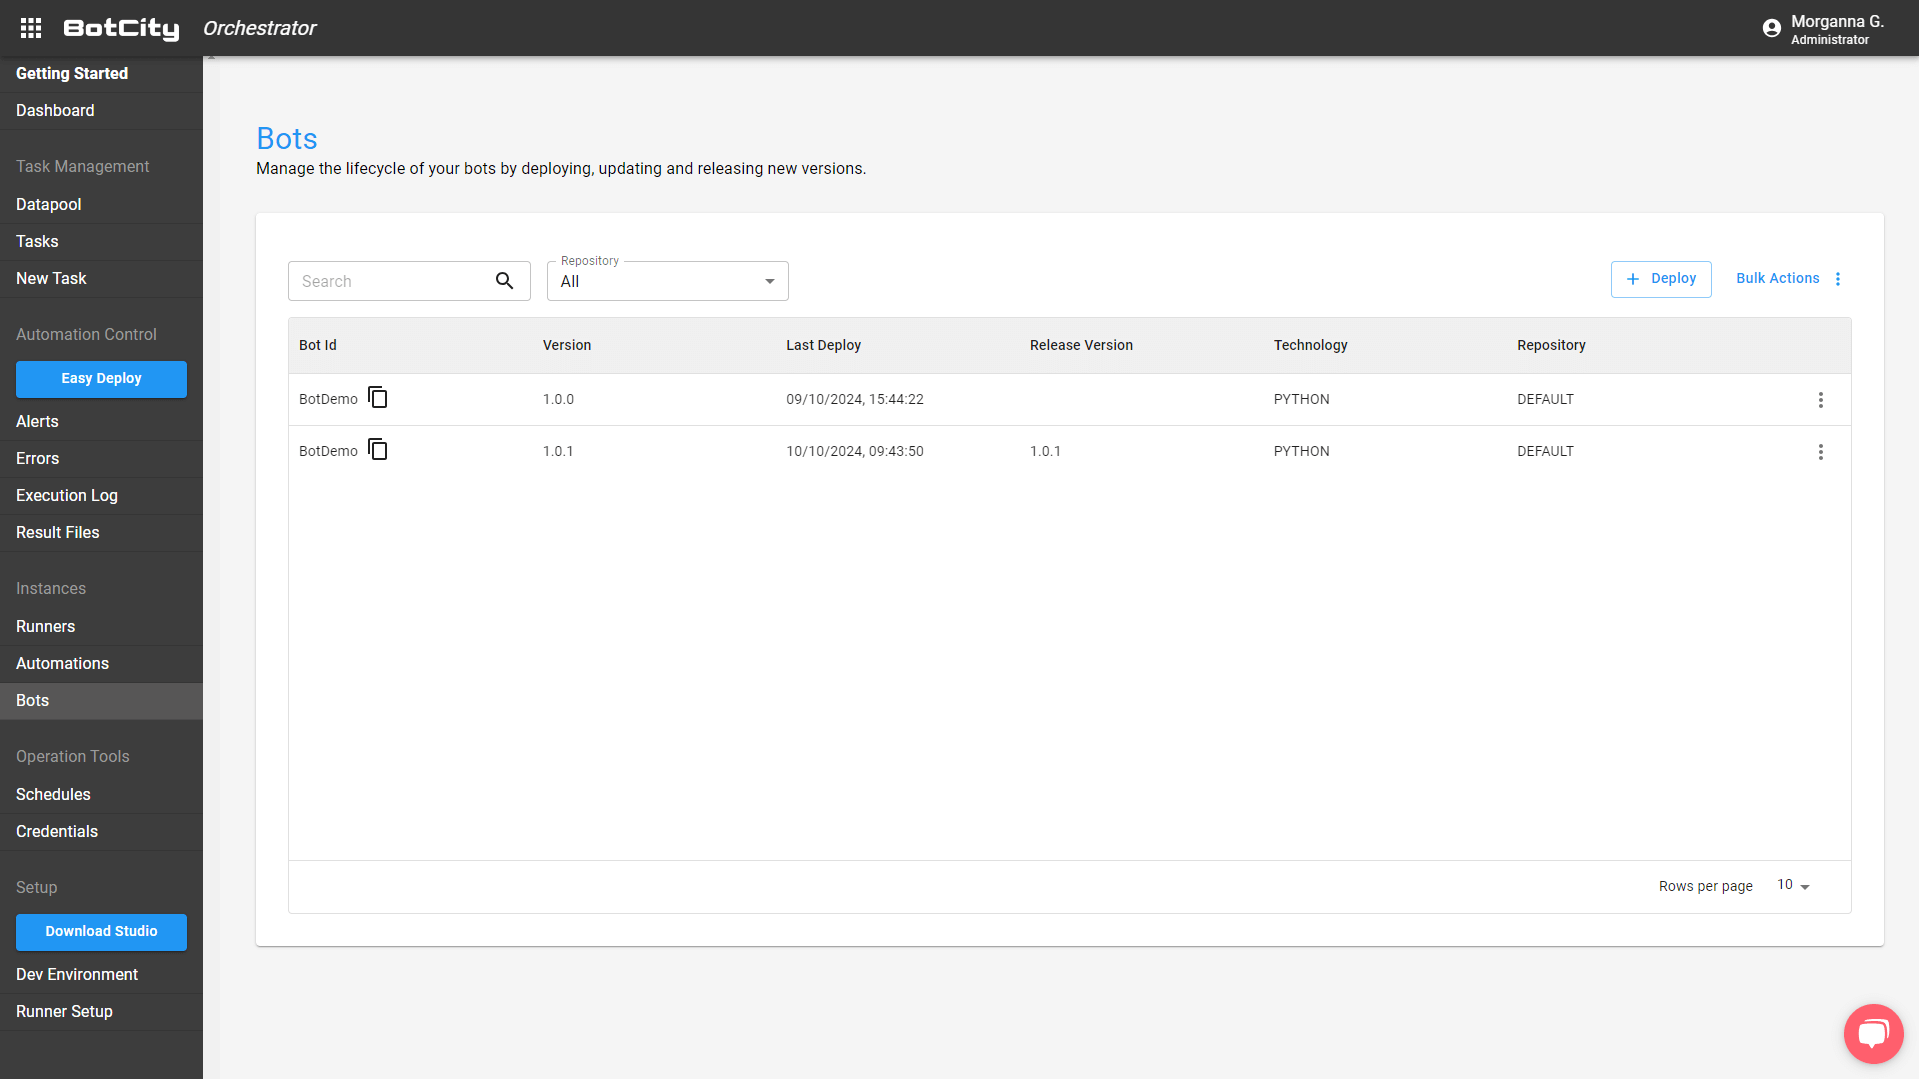
Notice that both versions are on the screen, but only one has the “Release Version” field filled in. It is the latest version, 1.0.1, that we just deployed. If you want to go back to the previous version, click on the 3-dot icon at the end of the version line you want and click on “Release.”
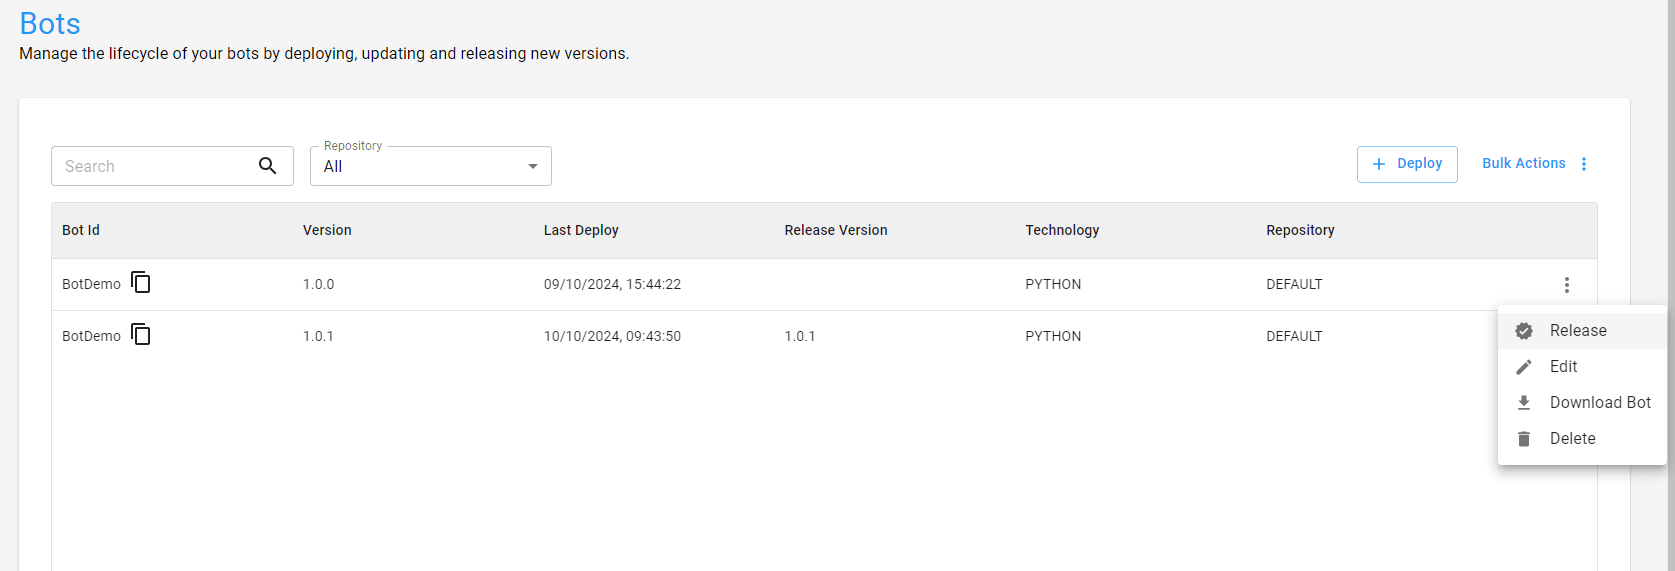
You will notice a new window for confirmation.

Click “Yes” and the new version is set to 1.0.0.

Manage your RPA automations with governance
To test the features presented, create your free account on the platform and follow the step-by-step instructions. If you have any questions, don’t hesitate to get in touch with us via our forum. Then, join our community to exchange experiences about the world of RPA automation.


